Getting a Network Ready for Awetonet.io
Brief Introduction to Awetobot
An Awetobot is a remote, lightweight server which runs on a Linux Distro, Debian.
The Awetobot itself does not perform any computation when it comes to performing automation. It gets all the instructions from the main brain, which is the Awetonet.io Portal.
The Awetobot requires internet, supports multiple Network Interface Cards(NICs) and Virtual Local Area Networks(VLANs).
When installing an Awetobot, internet is required to be configured on the Debian NIC in order to download the Awetobot packages. This NIC is by default untagged
Awetobot access to network over layer 2 and 3
For brevity sake, Awetonet.io refers to management of VLAN Q Tags using the terms Tagged and Untagged
Here's an example of what we mean:
//Assigning VLANs to interface 1/1/1 via Tagged/Untagged

switch(config)# vlan 5
switch(VLAN5)# untagged 1/1/1
switch(VLAN5)# vlan 20
switch(VLAN20)# tagged 1/1/1

switch(config)# show running-config
...
interface 1/1/1
untagged vlan 5
tagged vlan 20
...

VS

//Assigning interface 1/1/1 with VLANs via Trunk/Native

switch(config)# interface 1/1/1
switch(1/1/1)# switchport mode trunk
switch(1/1/1)# switchport trunk allowed vlan 20
switch(1/1/1)# switchport trunk native vlan 5

switch(config)# show running-config
...
interface 1/1/1
switchport mode trunk allowed vlan 20
switchport trunk native vlan 5
...
In order for Awetobot to discover and communicate with the network equipment, the Awetobot has to be on the same network.
This means the network equipment has to be reachable over layer 2 or 3.
Assume below is a typical network without any Awetobot yet:
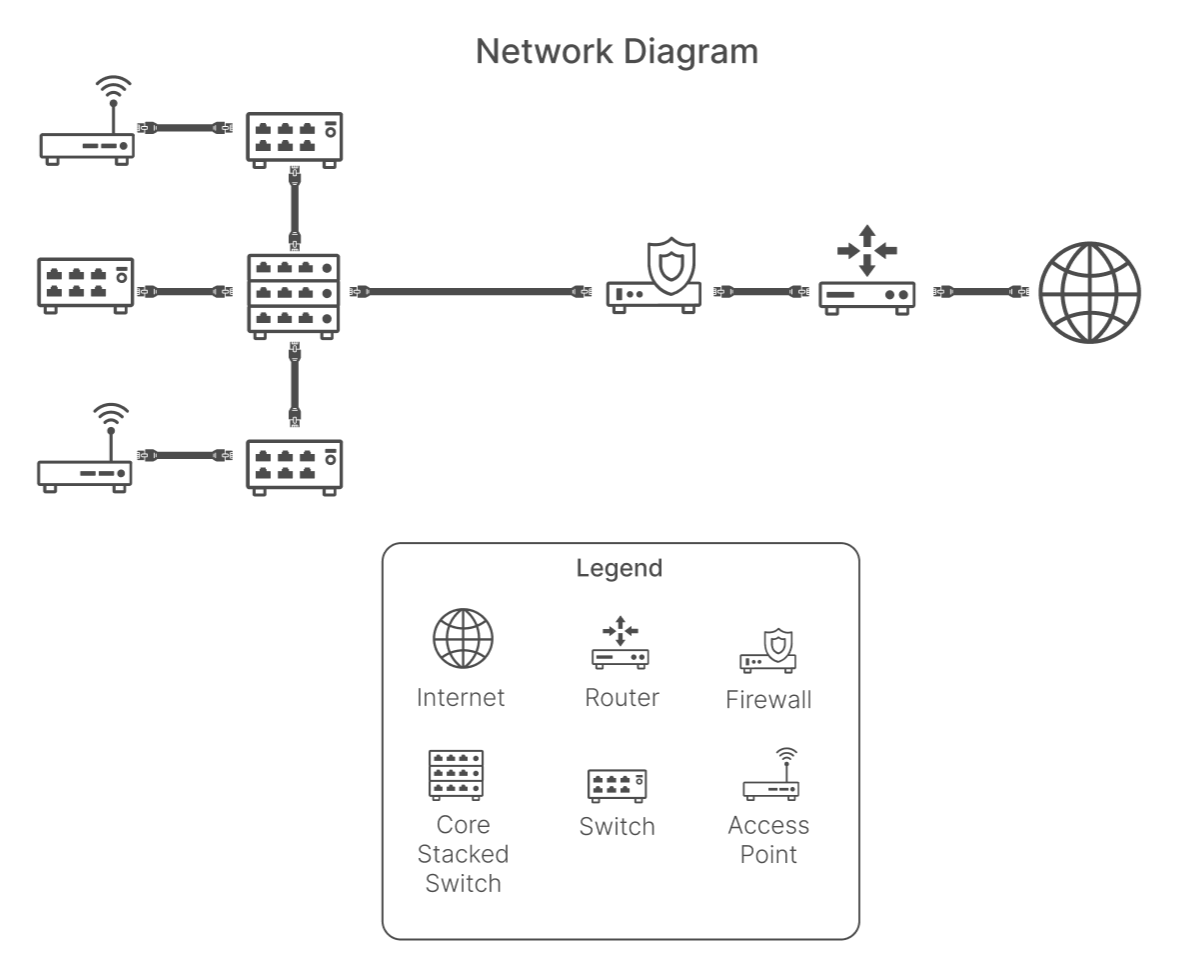
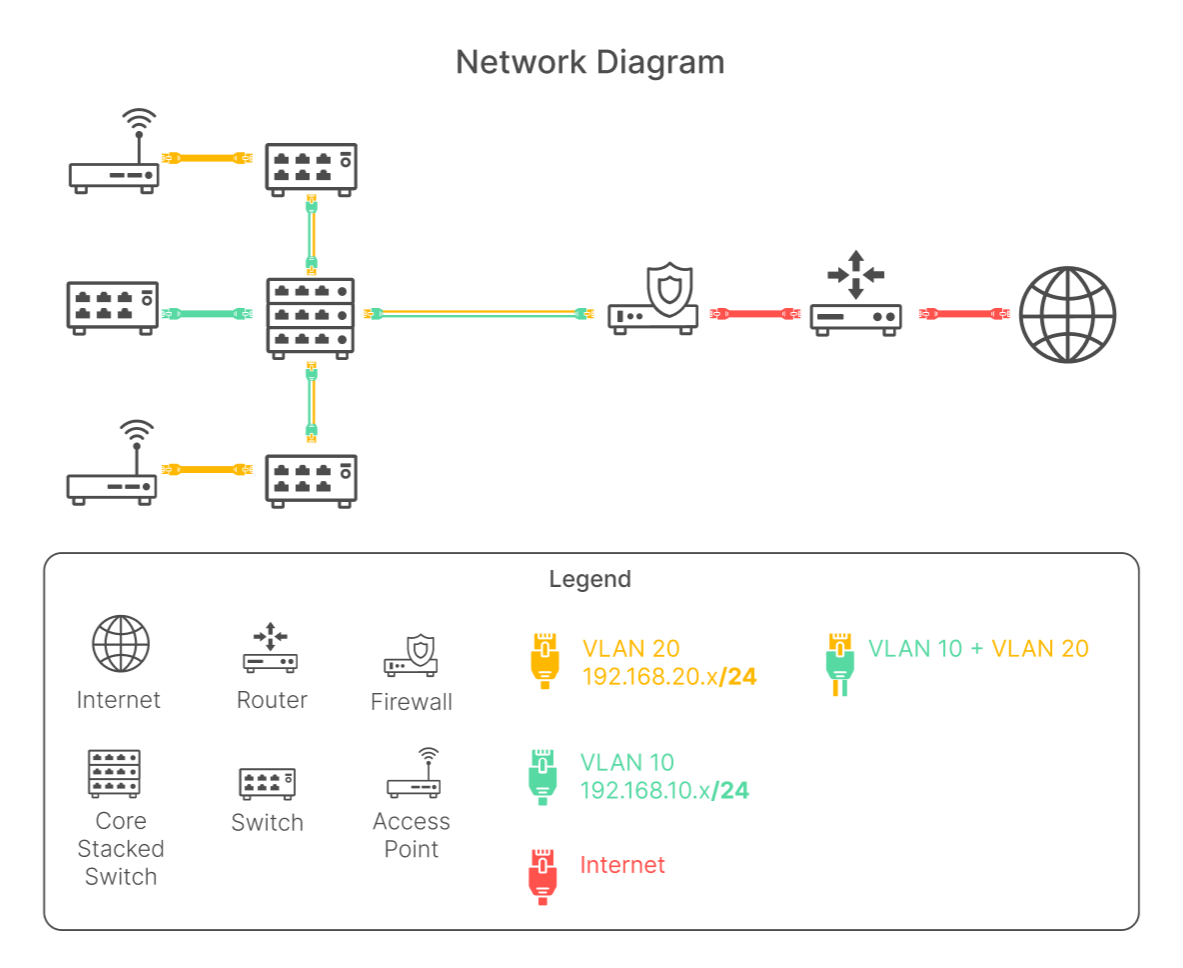
In the below example, assume the management of wired and wireless networks are separated via VLANs.
The following management VLANs are configured:
- Switch Management VLAN 10: 192.168.10.X/24
- Wireless Management VLAN 20: 192.168.20.X/24
Connecting Awetobot: Example 1 - Direct to Firewall
For this scenario, the fastest and easiest way for the Awetobot to be placed within the network would be plugging it directly into the firewall.
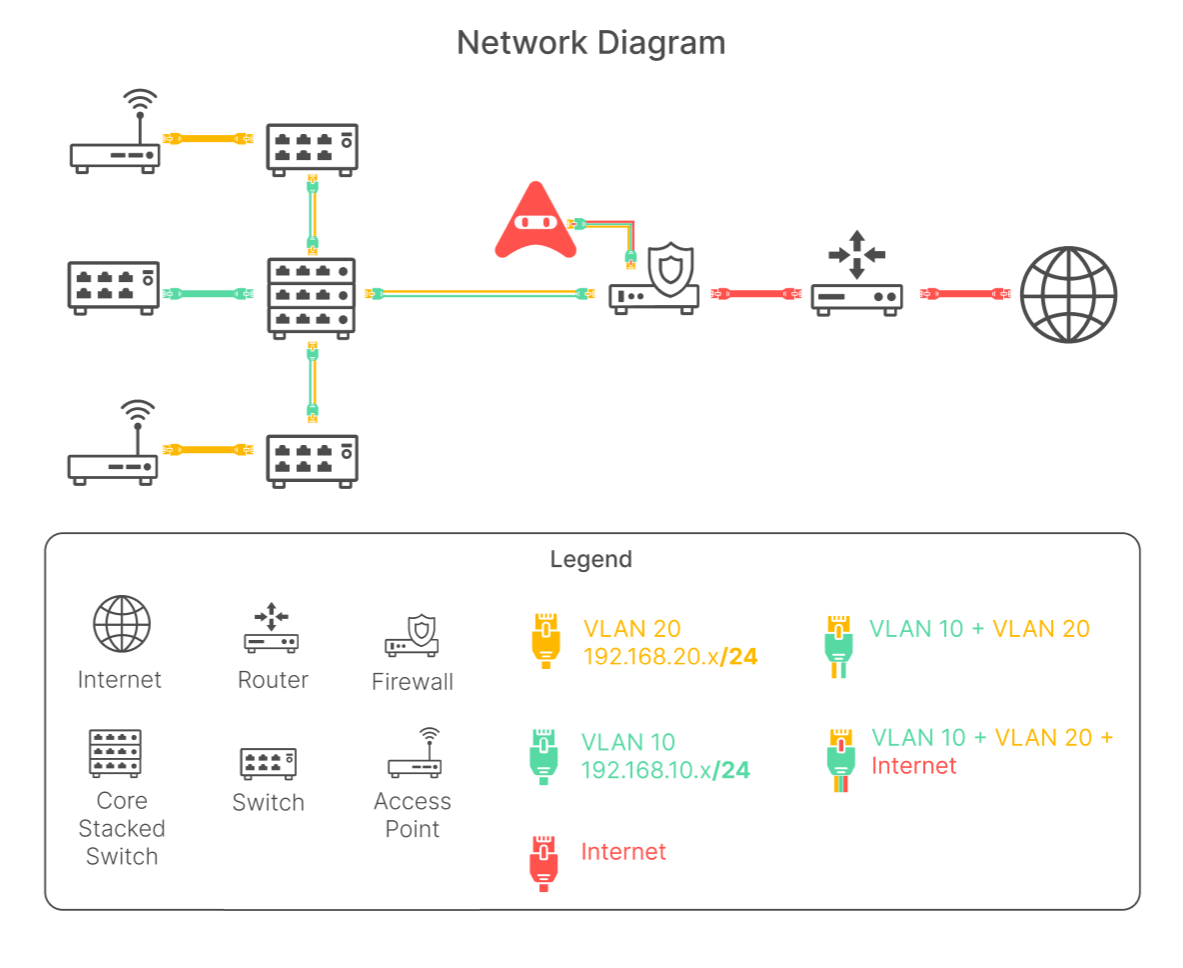
For this setup, the following should be configured on the Awetobot and the connected interface of the firewall:
Access VLAN: Internet
Tagged VLAN: VLAN 10: 192.168.10.X/24 to access Switches
Tagged VLAN: VLAN 20: 192.168.20.X/24 to access Wireless Access Points
Connecting Awetobot: Example 2 - Core Switch
For this next scenario, the Awetobot can be connected to the Core Switch. This will, however, require additional configurations to allow internet on the interface the Awetobot is connected to.
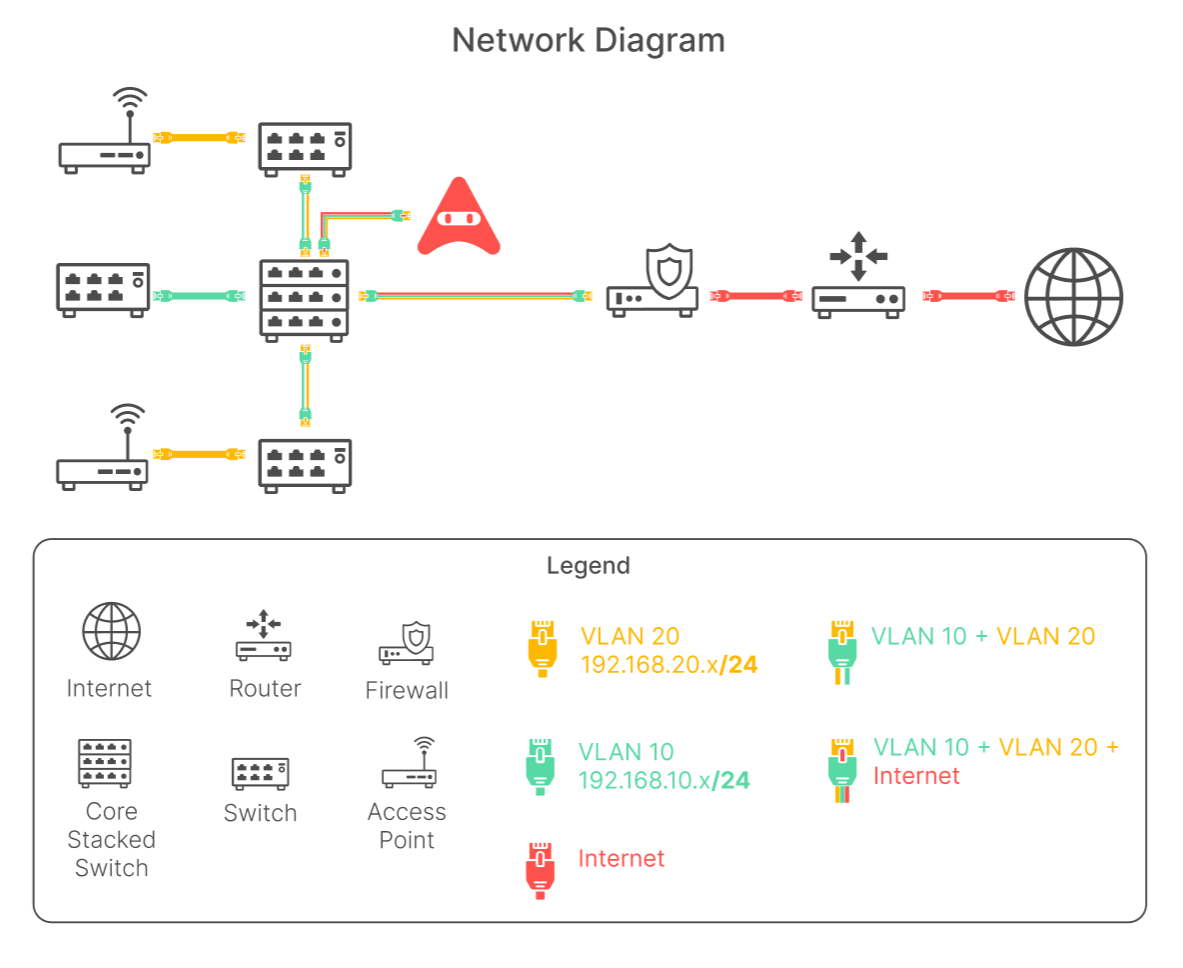
This setup can be configured as such on both the Awetobot and the interface the Awetobot is connected to on the Core Switch:
Access VLAN: Internet
Tagged VLAN: VLAN 10: 192.168.10.X/24 to access Switches
Tagged VLAN: VLAN 20: 192.168.20.X/24 to access Wireless Access Points
Connecting Awetobot: Example 3 - Multiple NICs
For this next scenario, the Awetobot can be connected to the Core Switch and the firewall. This setup is typically for networks which has designated a DMZ which separates the LAN and WAN.
This setup requires multiple NICs to be installed on the Awetobot
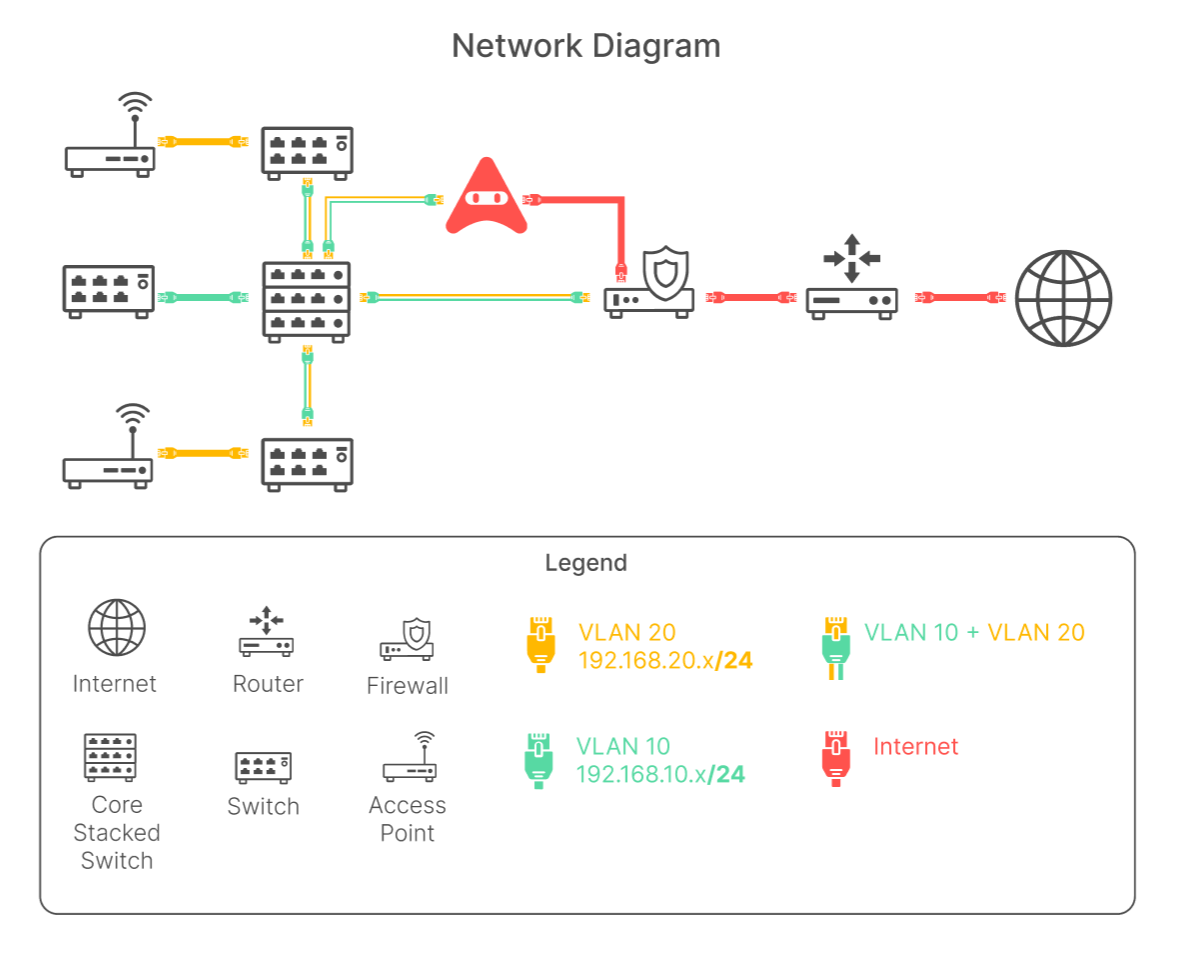
This setup will require separate configurations for each NIC:
Internet NIC:
- Access VLAN: Internet
Network NIC and Core Switch interface:
Access VLAN: VLAN 10: 192.168.10.X/24 to access Switches
Tagged VLAN: VLAN 20: 192.168.20.X/24 to access Wireless Access Points
Ensure at least one(1) VLAN is untagged for each NIC on the Awetobot