Adding VLAN Interfaces to Awetobot
(Optional)Accessing NIC interface settings on Awetobot via PIN
It is recommended that you add any VLAN interface(s) via the Awetonet.io's Portal instead of on the Awetobot directly
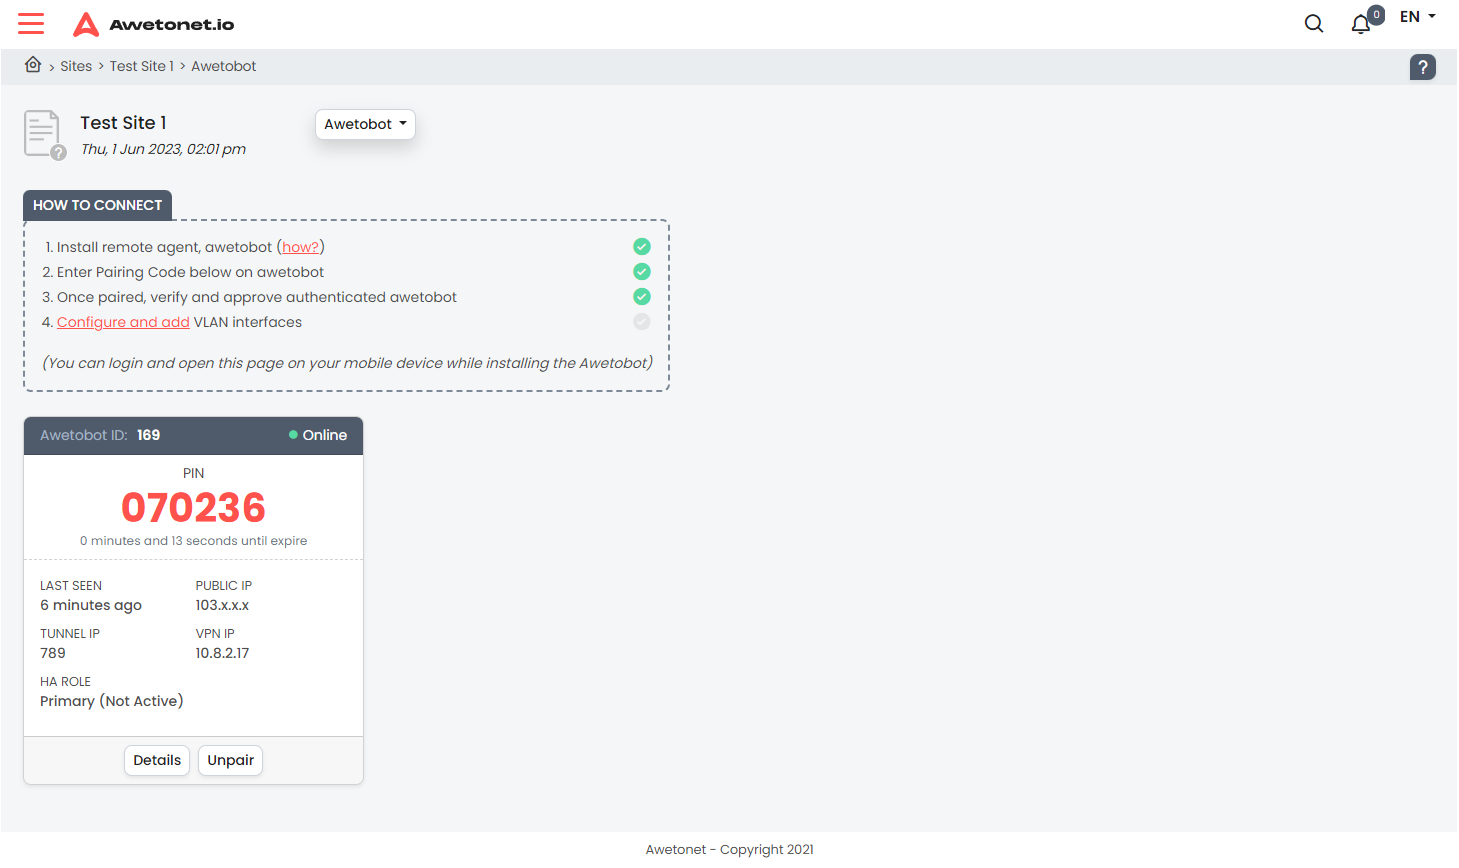
If you need to add VLANs to the NIC via the Awetobot directly, this login PIN can be obtained on the Site's Awetobot page.
Adding a VLAN interface to the Awetobot's NIC
This step is required only if the network equipment can only be acccessed via VLAN. Refer to Getting a Network Ready for the different Awetobot connection types.
If you do not intend to add any VLAN interface to the Awetobot's NIC, proceed to Discovery
Once an Awetobot is paired, the Awetobot card on the Awetonet.io's Portal will display the following buttons:

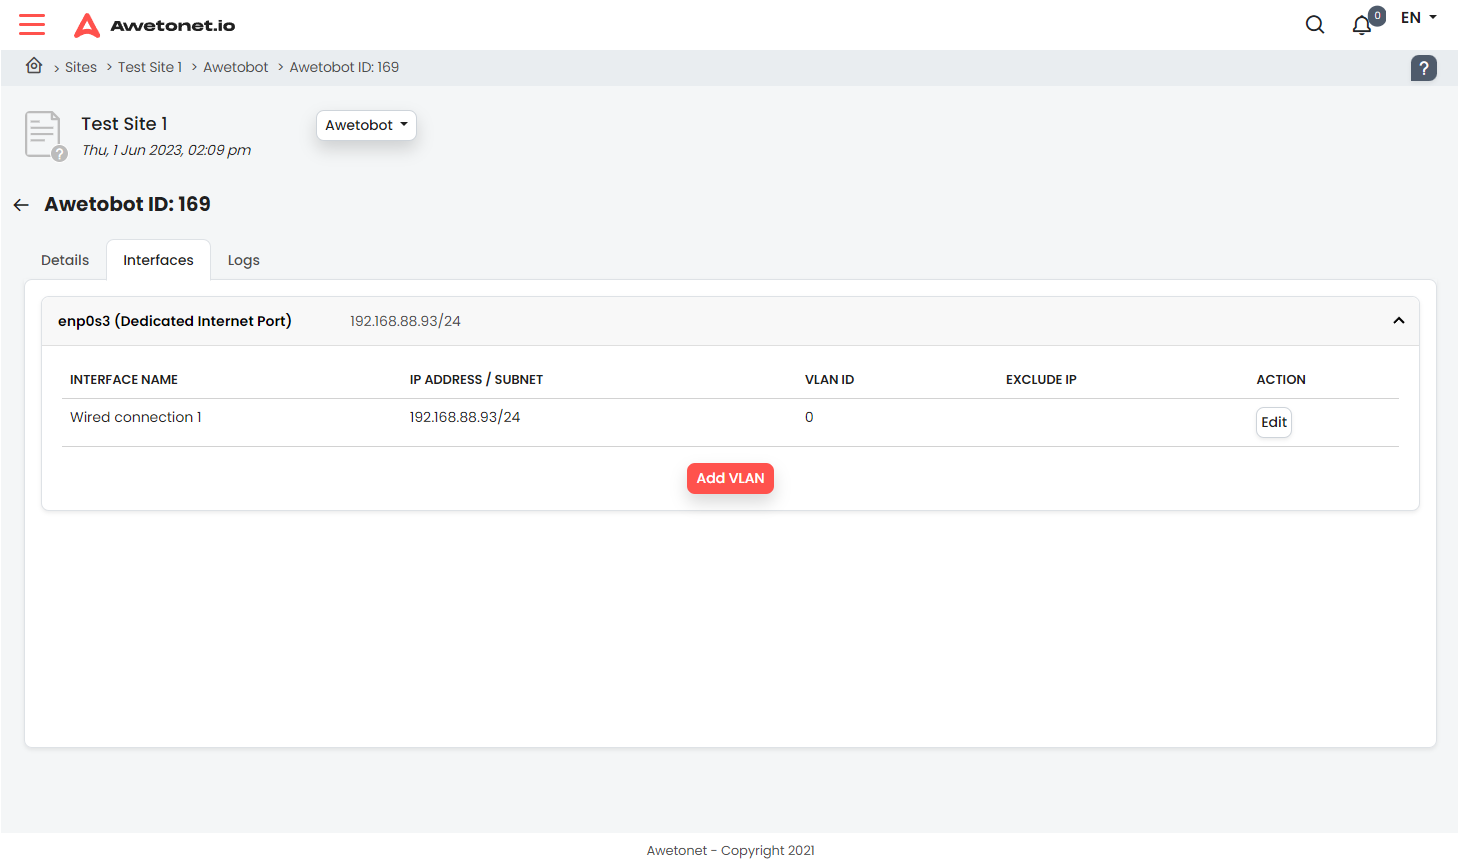
Clicking on Details leads to the Awetobot's Interfaces Settings:
 note
note- Every NIC listed on this page belongs to a dedicated NIC which is detected by Debian
- The IP Address which appears by default at the top of the list for each NIC is the IP Address configured/assigned in the Ubuntu machine, and is on Access; this should also be the internet interface
- Changes to this IP address needs to be done on the Debian GUI, followed by a reboot
- Every new interface added on Awetonet.io Portal is a Tagged VLAN
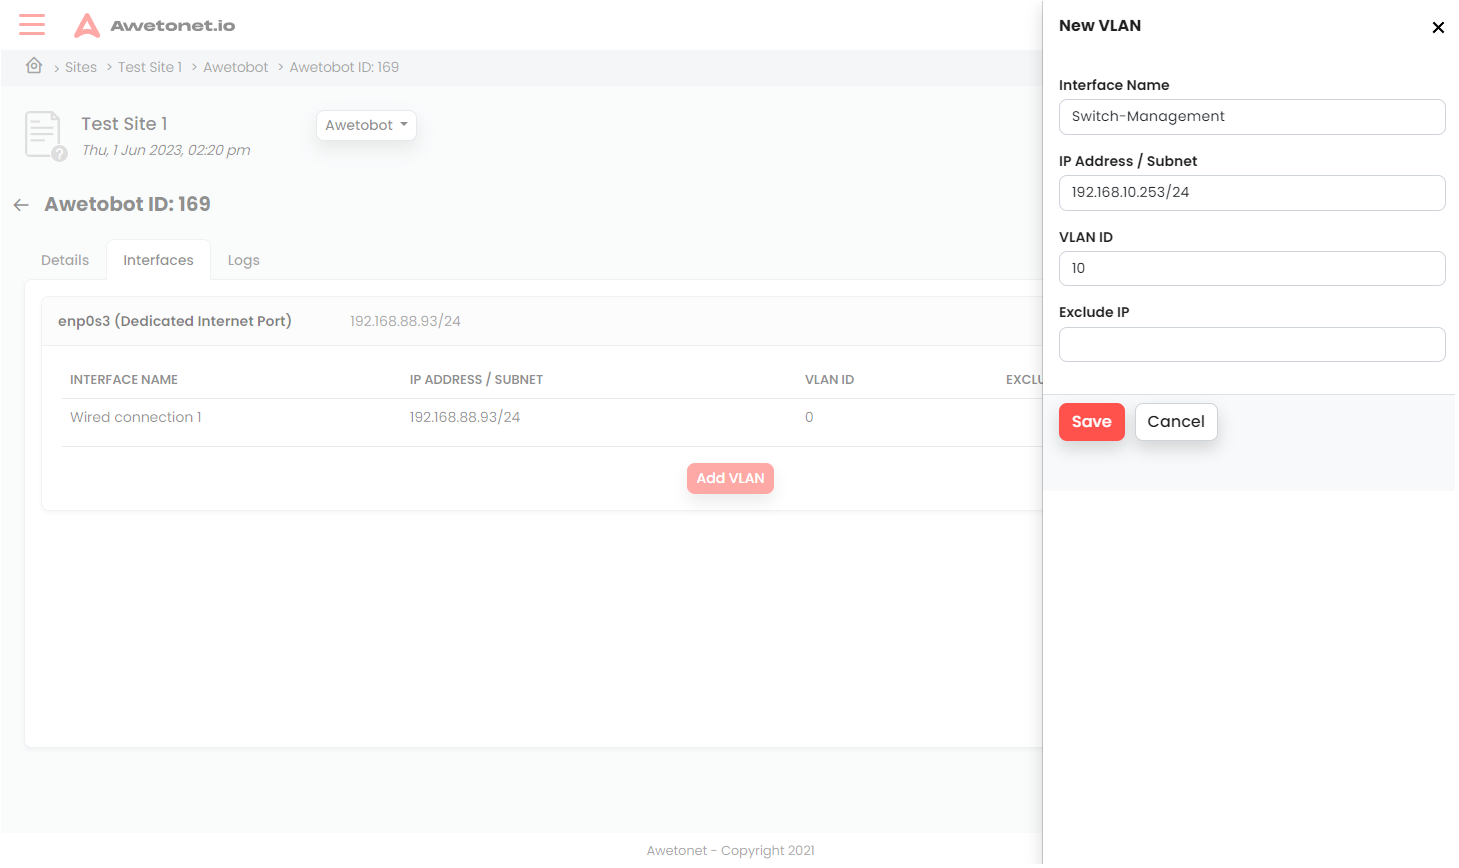
In this example, we are adding a Tagged (Switch Management) VLAN ID 10 and assigning this interface on the Awetobot with the IP Address: 192.168.10.253/24. Click Add VLAN

Interface Name:
Key in a meaningful name to label this VLAN interface.IP Address/Subnet:
Key in the IP Address/Subnet which is on the same range as the intended network equipment/node. e.g. 192.168.10.253/24VLAN:
Key in the Tagged VLAN ID which corresponds to the interface the Awetobot is connected to and the intended network equipment/node.Exclude IP:
Key in the IP address(es) which you want excluded from Awetonet.io Discovery. e.g. 192.168.10.1, 192.168.10.2
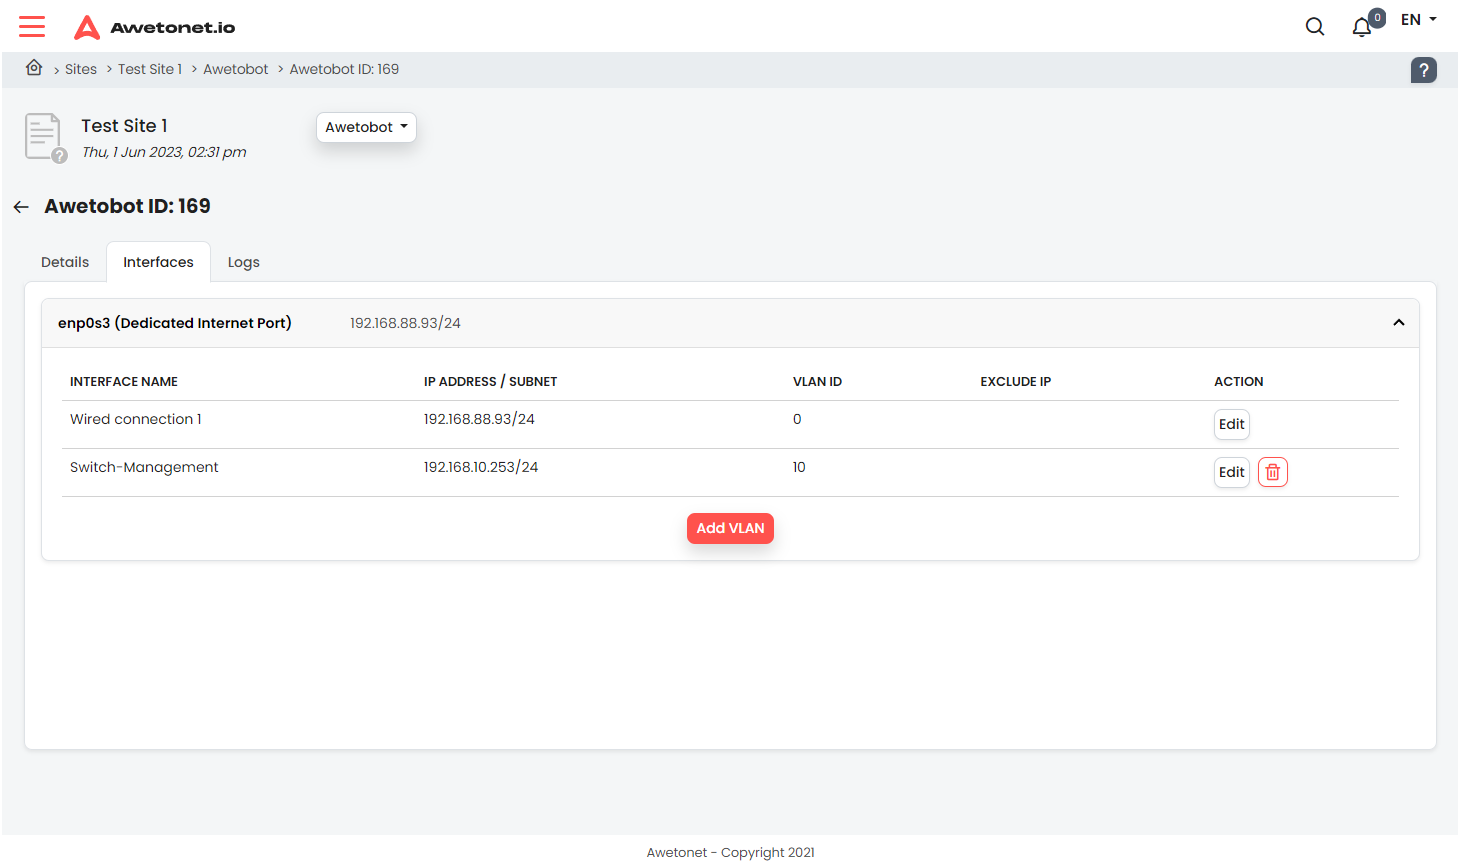
Once complete, click Save, and the Interface will appear in the list

Next, on to Discovering your nodes